|
Working with Layer Setting manually of cut layer in any position of diamond.
It is necessary to have any model for work with Layer.
Step 1. Create ordinary object Layer.
Click on the button  by the right click of the mouse in the panel Objects for the model in Scene. Choose and press New plane. by the right click of the mouse in the panel Objects for the model in Scene. Choose and press New plane.
Step 2. Make Layer as operated by user.
Click on the button by the right click of the mouse in the panel
Objects for the Layer. Choose and press Set layer position by
handle. Thus you create new object Tune: Layer.
Step 3. Set Layer in the necessary position.
Position of Layer is defined by four methods:
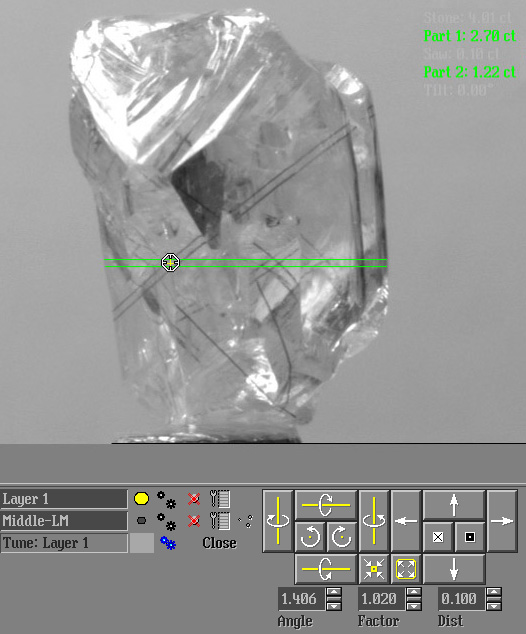
- One cross - moving of Layer in the horizontal plane (Figure 1)
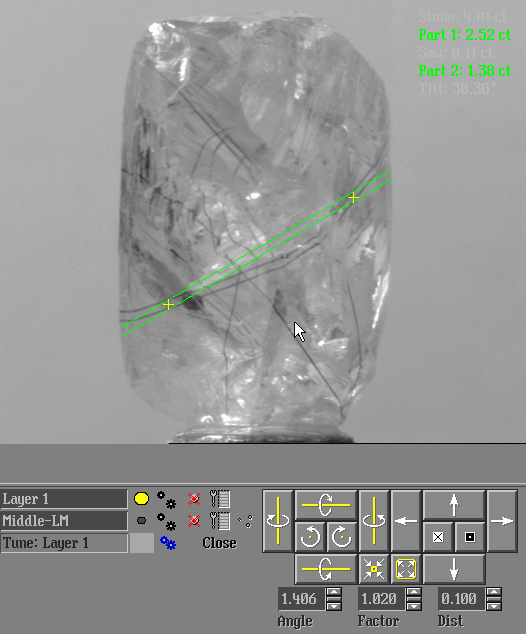
- Two crosses - rotation of Layer relatively one of cross-points
in the screen plane (Figure 2)
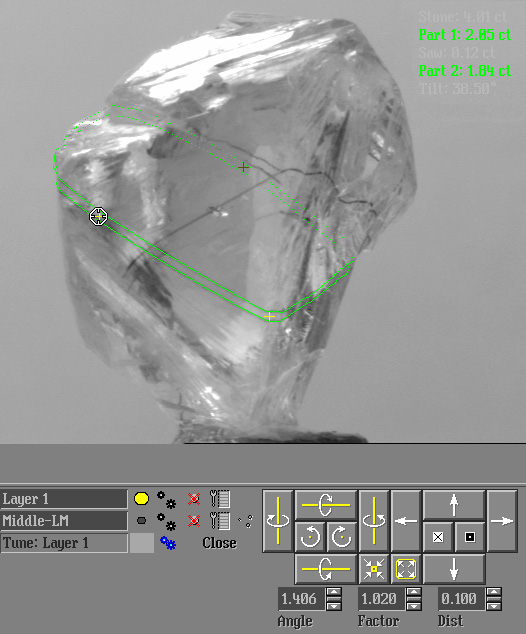
- Three crosses - Layer passes through 3 crosses - rotation of
Layer relatively line which passing through two crosses of three (Figure 3)
- Four crosses - Layer is defined by the way of minimization of
mean-square distances between points (crosses) and Layer
When you created Tune: Layer you see information on the top corner of Scene
(Figure 4). You can switch off- switch
on this visualization of information by the pressing on the
first button near new inscription Tune: Layer in the panel
Objects.
 |
| Figure 4 |
The 3rd and 4th methods are wide applied during checking of existed (created
by signer manually on the real diamond before) marking layer.
There is short description of this process:
- Planning of diamond manually by the pen - create marking layer.
- Scanning and building of model of diamond on 3D scanner.
- Rotate diamond in position with good view of line. Repeat
operations 1 - 3. First described upper - create first cross
on the line (Figure 5, a).
- Then in the same position create second cross (Figure 5,
b).
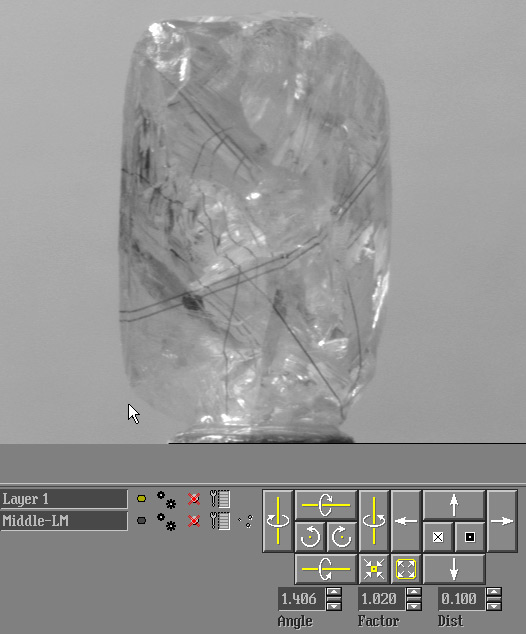
- Rotate stone with help of motors to see opposite side of layer.
- Create third cross (Figure 5, c). So you set object Layer in correct position.
- Press Close in the panel of objects near object Tune: Layer.
 |
| Figure 5, a. First cross |
  |
| Figure 5, b. Second cross |
  |
| Figure 5, c. Third cross |
Remove any cross.
You can remove any cross by the next way: move the mouse cursor
in the area of any cross, press by the right button and choose Remove
point. |