|
We wish to explain a problem with measurement of diameters that can result in differences between manually
measured and Helium scanned diameters. We will use an example to describe the variations and explain our solution.
There are diamonds and CZ's which have girdles which have a conical format; i.e. opposite sides of the diamond's girdle are not parallel (as shown in figure 1 (a, b) from a Helium scan which has a 4° inclination from the vertical).
| Figure 1. Model of a CZ created with Helium. Note the girdle's deviation from vertical in the magnified image. |
|
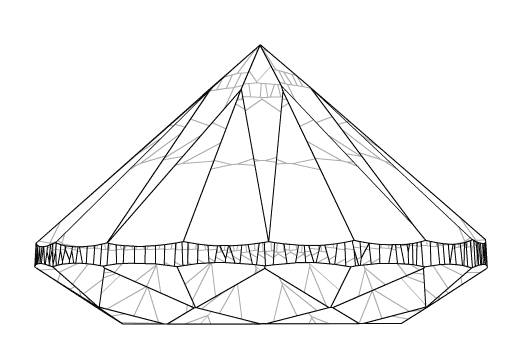
a) Side view of the CZ model.
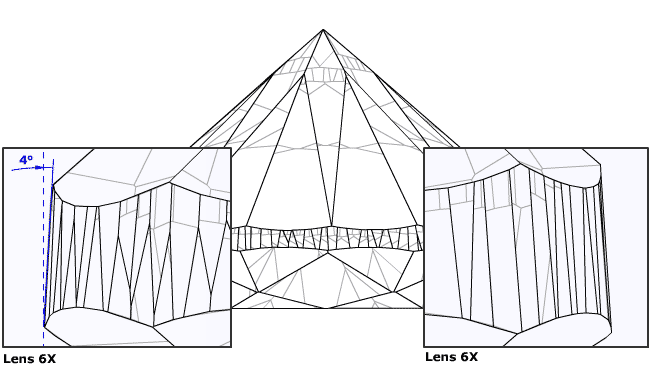
b) Magnified side view of the CZ model. |
When we manually measure the diameter (with an instrument like a Leveridge gauge, micrometer etc) the
orientation or direction of the measurement of diameter can be influenced by the girdle surface. This can lead even experienced
experts to make an error.
If the device uses a hanging approach, such as the when the diamond is suspended between two prongs or
jaws, then figure 2 shows how the instrument will usually clutch the diamond in such way that one part of girdle surface
will be snug against a claw, while the other side will touch only one edge.
|
Figure 2.
Manually measuring diameter with a measuring instrument can result in the measurement of a shorter distance
because the instruments jaws can align themselves with the girdle plane which may not be vertical. The blue
line demonstrates the mistaken diameter measurement.
|
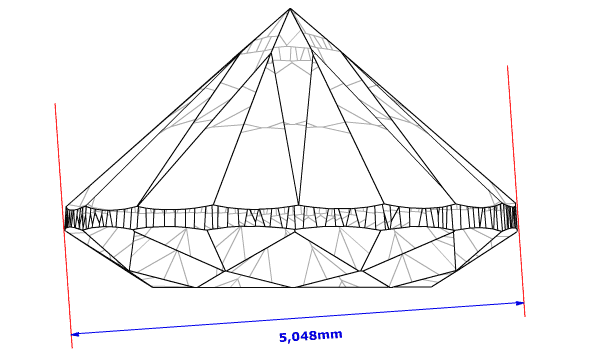
a) Side view of the CZ model.
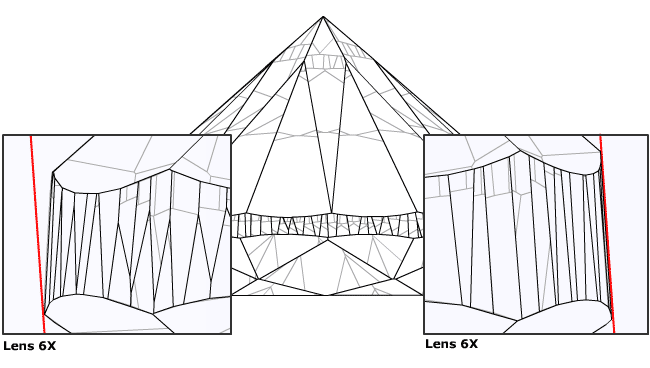
b) Side view of the CZ model with two blown up areas. |
Even when we place the diamond table down in a Leveridge gauge, the stone can move ever so slightly,
so that the diamond's table is no longer resting flat on the instrument. The result is a shorter measurement.
The Helium system measures the model's diameter as a distance between two parallel vertical planes, placed
perpendicularly to the table plane, as close to each other as possible. This could be likened to a more correct manual
measurement; the diamond is held down flat in a Leveridge gauge by applying pressure with ones finger on the culet.
|
Figure 3. Measurement of diameter by the Helium system shows the distance between vertical planes (red lines) that determines
the diameter. The blue line demonstrates the diameter is 0,011 greater than the likely manual result. |
|
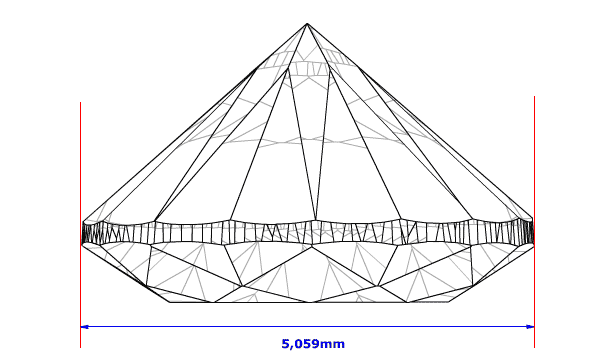
a) Side view of the CZ model.
|
Thus, the manual measured diameter (figure 2), can differ from the value of the diameter measured by
Helium. But the Helium measurement is the same as a manual measurement using the correct technique. The difference between
values in this actual example* amounts to 11 microns or 0,011mm.
*CZ of 0,5 ct, average diameter 5,06 mm, angle of girdle tilt is about 4°.
Calculation of the report parameters
|


