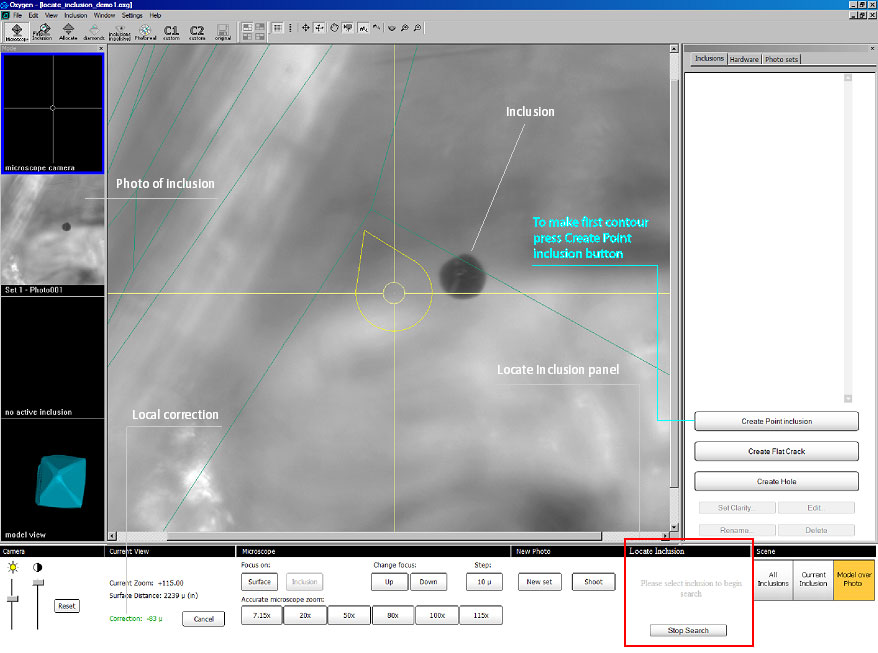
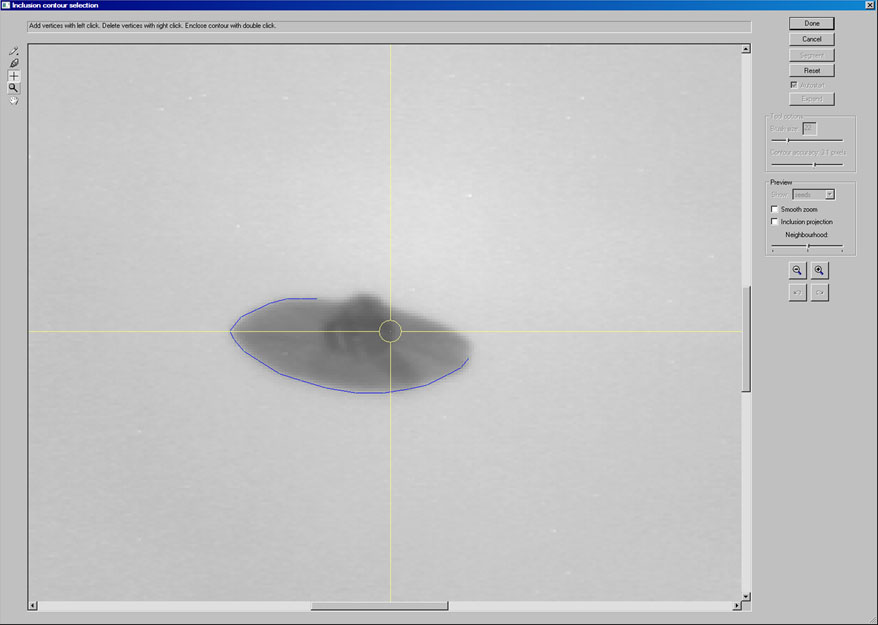
Step 1. Select a facet with point inclusion via microscope. Adjust the focus on the surface, focus on the inclusion and make a photo. To make first contour press Create Point Inclusion button.
Step 2. Make a first contour of inclusion in the Inclusion contour selection plug-in.
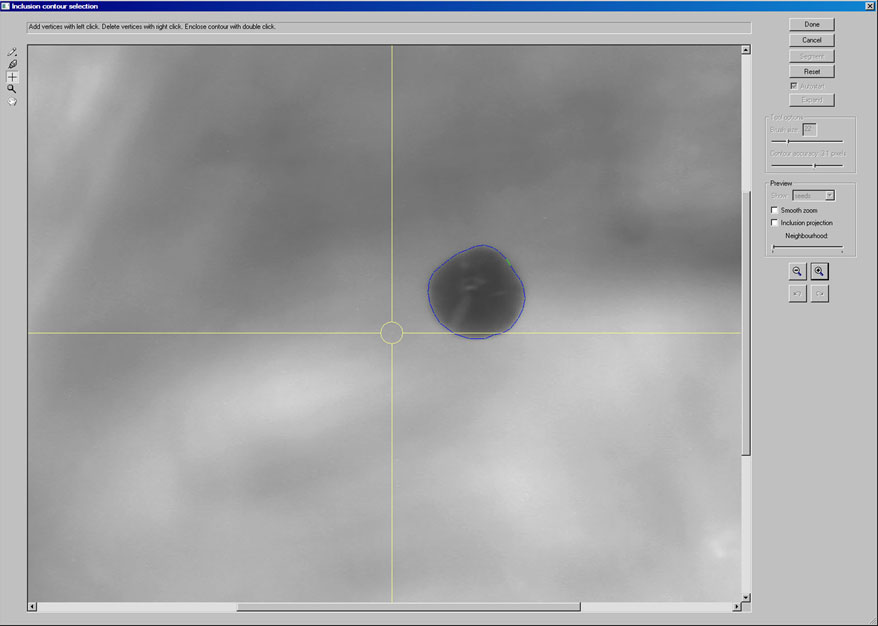
Press Done
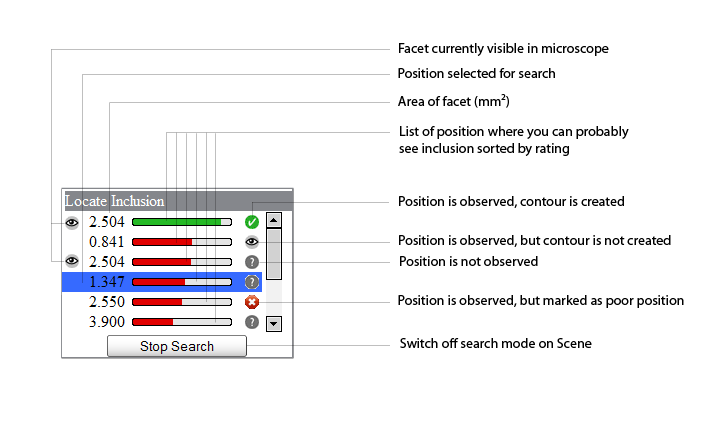
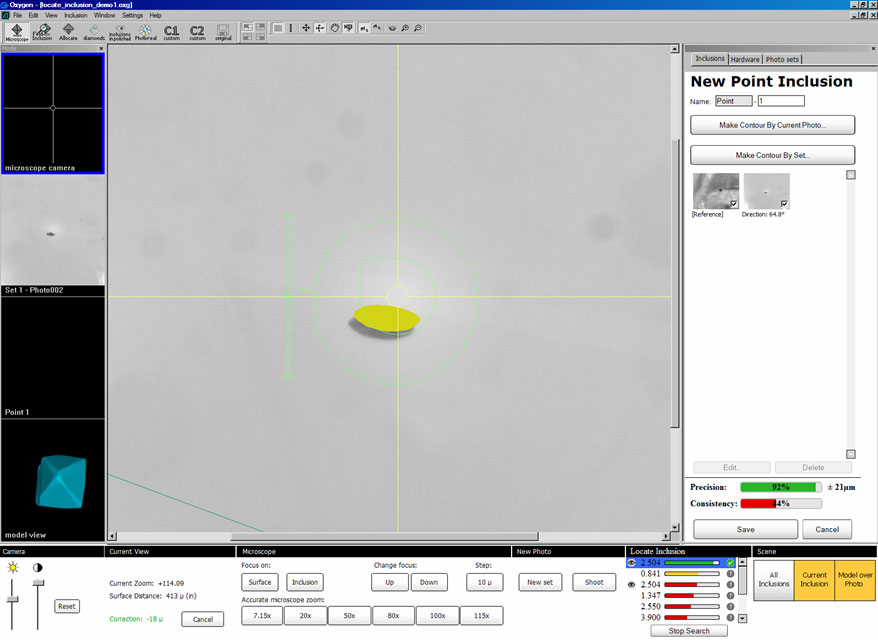
Step 3. When the first contour is ready the Locate Inclusion panel will be active and show perspective positions* where you can probably see inclusion. Select one of the positions in Locate Inclusion panel, for example top position with green colour indicator.

*The indicators of positions show its profits by colour and length, square of facets and status. Status of positions can be following:
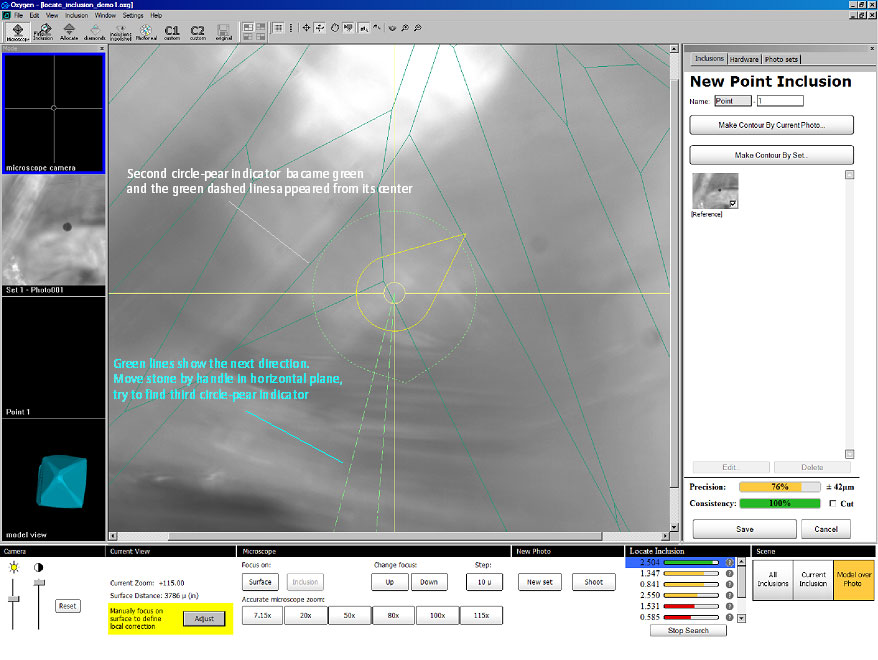
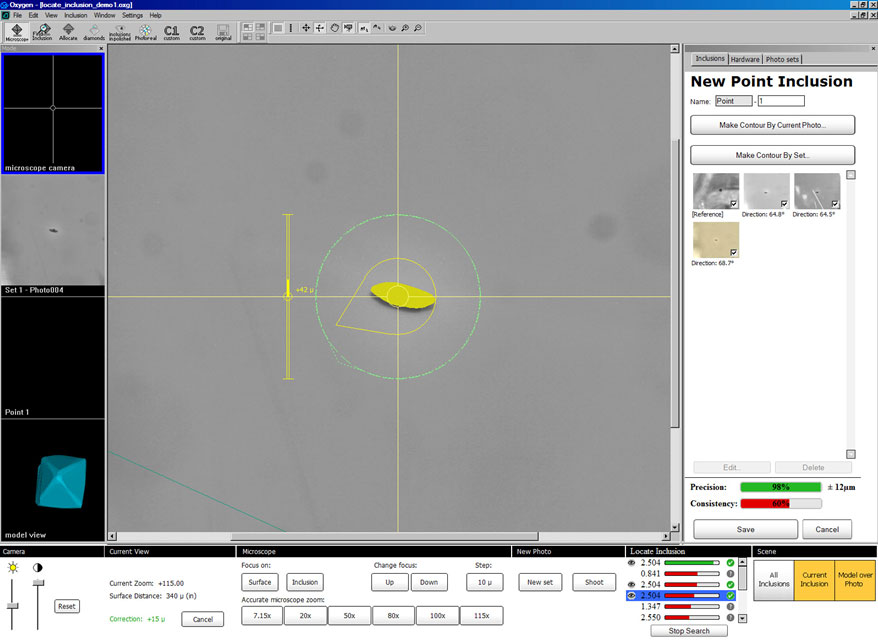
Step 4. New second circle-pear indicator (red) will appear around fist circle-pear indicator (yellow). This indicator shows the direction to position for next inclusion contour. Rotate the stone by handle and look for the second circle-pear indicator. Try to make it green.
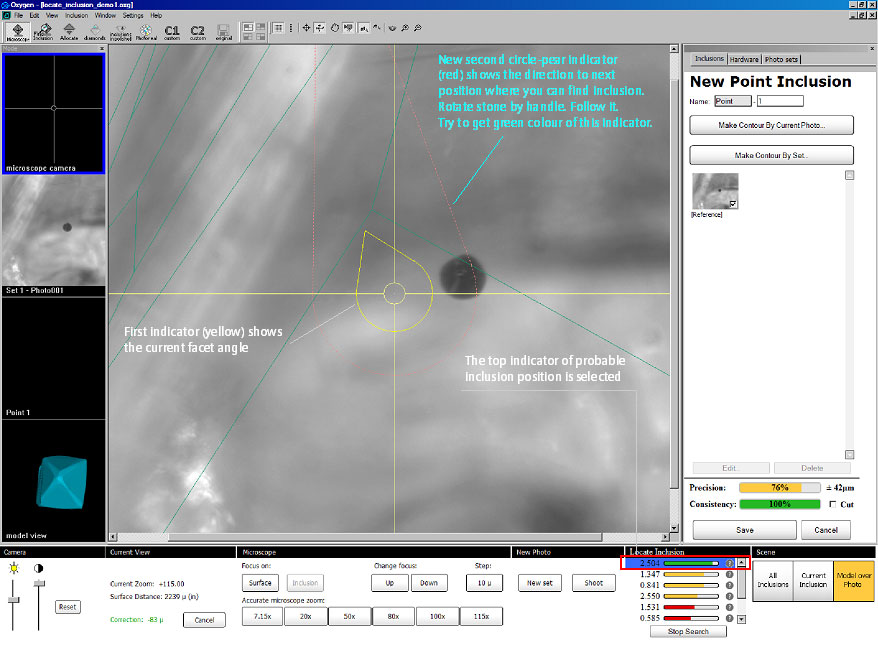
Step 5. Rotate stones until second circle-pear indicator became green and green dashed lines appeared. Green lines shows the next direction. Move stone by handle in the horizontal plane, try to find third circle.
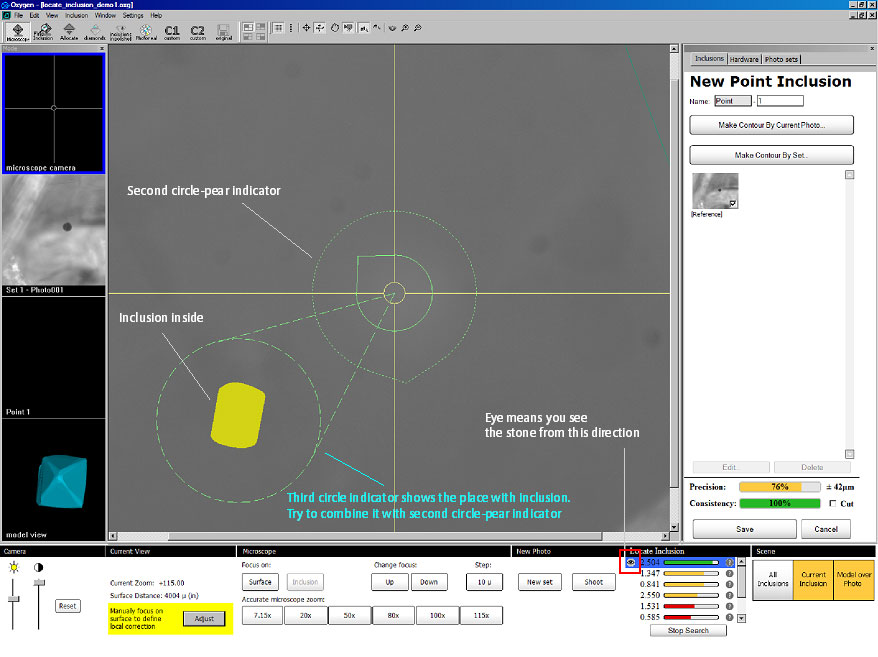
Step 6. Move stone by handle until third circle indicator will appears. Then try to combine it with second circle-pear indicator.
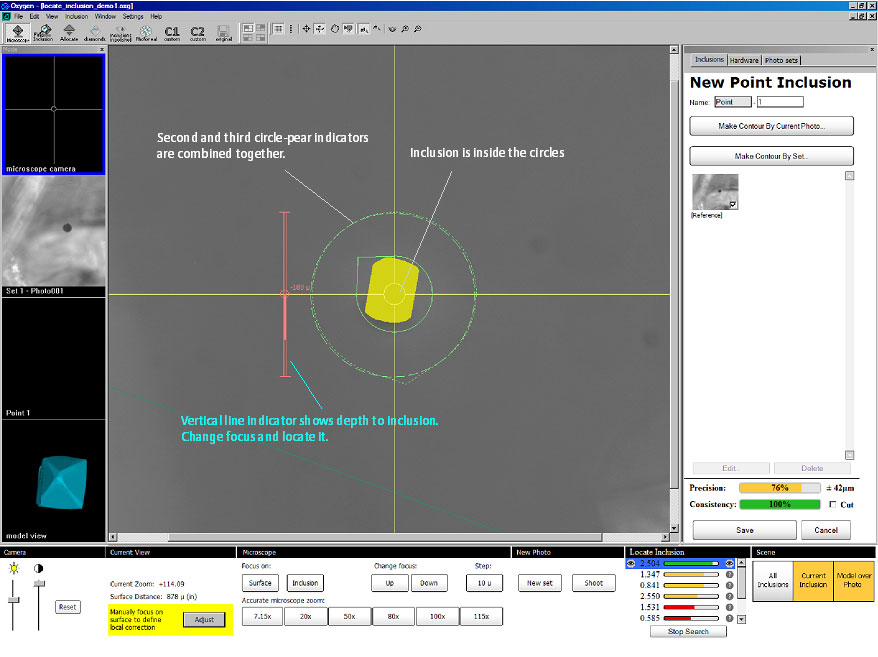
Step 7. You can see on the picture two circles are combined together. The inclusion is in the center of the circles. Now you should define the focus of inclusion via vertical line indicator.
To focus on inclusion automatically use Focus on: Inclusion button in the bottom panel Microscope. To focus on inclusion manually use button Change focus: Up / Down with suitable step in the bottom panel Microscope or use Leica mouse.
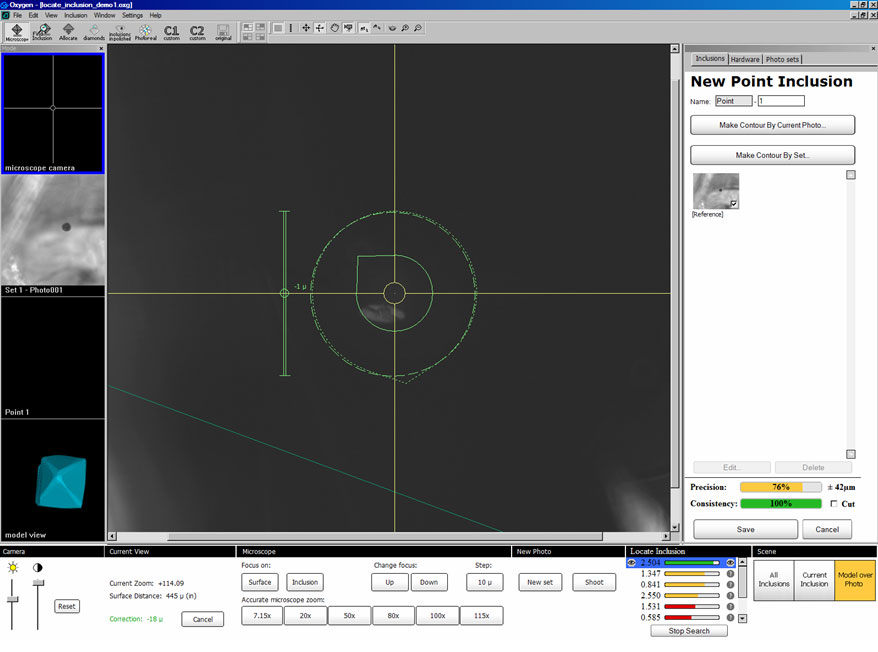
Step 8. The position navigation is completed. If you are not able to see inclusion click on the corresponding question mark to set status of this position as poor, then select another position. If you can see inclusion make photo and create new inclusion contour (do not forget to adjust focus on surface before making photo).
Step 9. Make contour and press Done
The new inclusion is ready.
The Locate Inclusion panel shows next perspective position for new contour. You can select it and obtain the next inclusion contours the same way.
Step 10. More inclusion contours..
|


