|
July 22, 2009 - Oxygen Microscope software version 2.5 is available for download.
Table of content
- New context based interface for creating inclusions
- Example of working with new context based interface. Creating a
new inclusion
- Tools for creating inclusions contours are available in Scene
- Inclusion selection tool
- Small interface improvements
- Inclusion numbering for every type of inclusions
- Different names for different types of cracks, flat and curved
- Changing status for several inclusions and deleting several
inclusions are available in the inclusion list
- Search inclusions panel for cracks
- Adding precise contour into deep points without switching between Microscope camera and Photo view mode
- Creating a Deep point or its precise contour by mouse click in
Scene in place where you want to create it
- Changing photo sets of HR photos without changing number of
photos
- Effects
- Auto Exposure
- New type of inclusions Cloud
- Creating Hole by photos from Helium Rough
- New Blind method for creating Cracks
- HDR photorealistic diamond and inclusions visualization
- Autosave file option
- Auxiliary points in allocation
New context based interface is available for creating inclusions. The new interface allows
to make and modify inclusions faster, clearly and comfortable. The principle and method
of creating inclusion are still the same.
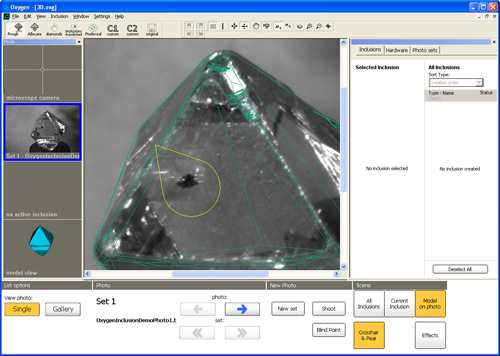
The small example below shows how new context based interface can be used.
For detailed description of creating different types of inclusions please read
section 4. Creating Inclusions in the Oxygen Microscope with the New Context
Based Interface in the Oxygen Microscope Documentation (PDF)
1.1 Example of working with new context based interface.
Creating a
new inclusion |
Table of Content |
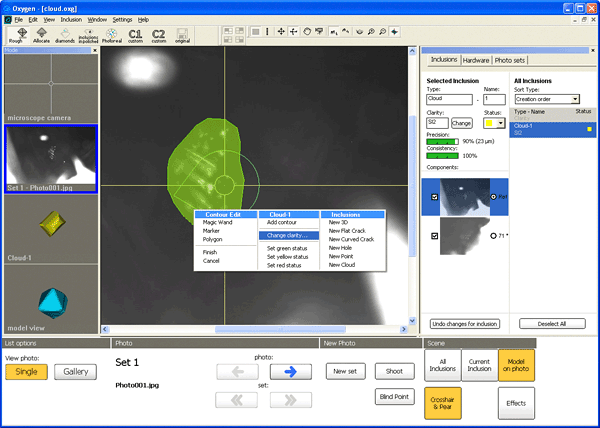
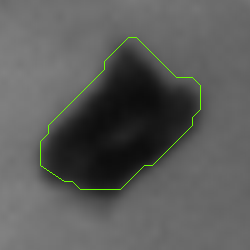
To create new inclusion and make first contour:
- Select photo with inclusion and zoom it
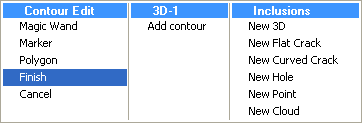
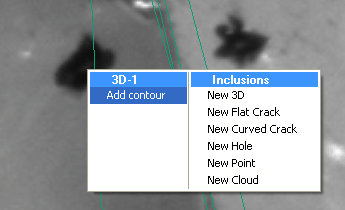
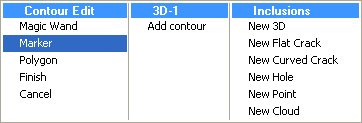
- Right click mouse on photo in Scene to open context menu
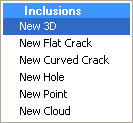
- Select type of inclusions: 3D, Flat Crack, Curved Crack, Hole, Point or Cloud
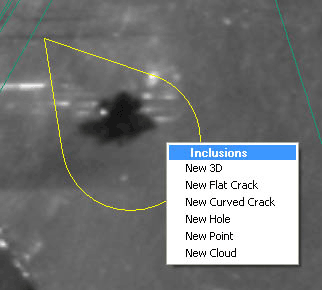
- Draw inclusions contour with left mouse clicks
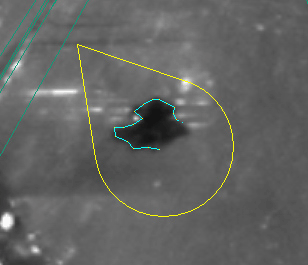
- Double click to enclose contour

- Perform contour if need
- To finish making contour select Finish in context menu
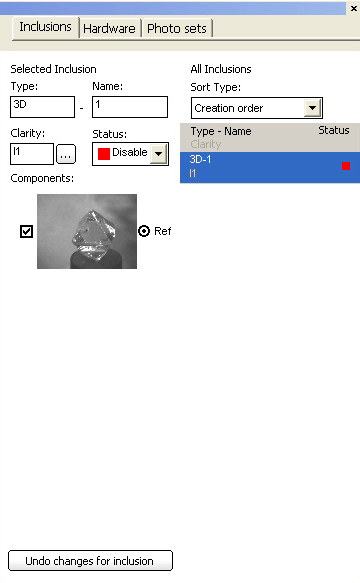
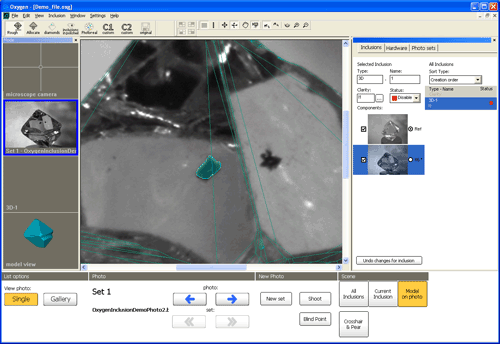
- Then contour is finished the new component of inclusion will appear in the
Inclusions panel:
- Note. There are several methods to finish creating contour:
Just begin to make a new action like add contour, add new inclusion, select another
inclusion and so on or switch to Microscope or Model view mode. The contour will
be enclosed and finished automatically (in case the contour is correct and has no self
intersections).
To cancel creating contour select Cancel in context menu
The buttons Done, Add and Delete are not available any more in the Inclusions panel.
All these options are accessible in context menu now:
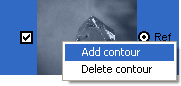
- Right click mouse on inclusion component in the Inclusions panel to add new
contour or delete current contour:
- Or right click mouse on any place in Scene and select Add contour in context
menu to add new contour:
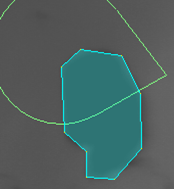
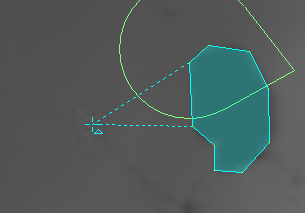
To create second contour:
- Select photo from another direction
- Select Add contour in context menu in Scene or in context menu of Inclusions
panel
- Make new one contour the same way
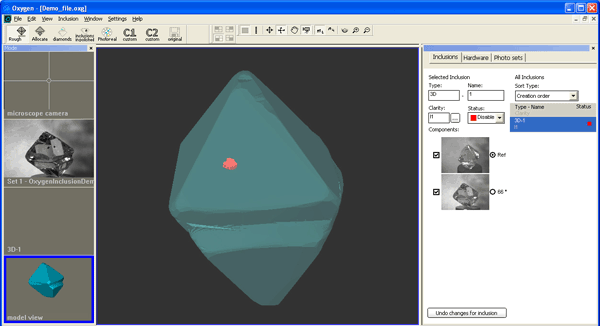
- Then new contour is finished the second component of inclusion will appear in the
Inclusions panel
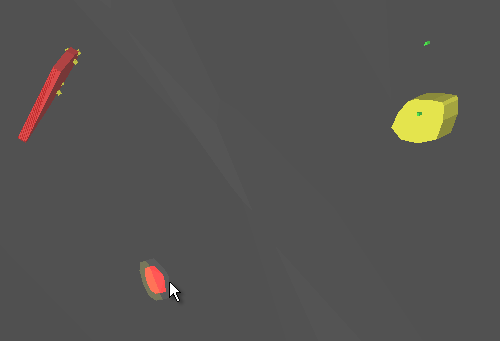
The new 3D inclusion is ready. See it in the 3D model view:
1.2 Tools for creating inclusions contours are available in Scene |
Table of Content |
Now creating inclusions contours is available in Scene - in the main window of the
program, instead of creating it in the separate window. The new feature allows to make
and edit contours more fast and comfortable.
There are three contour creating tools: Magic Wand, Marker and Polygon.
Note. Right mouse button click in previous versions of Oxygen is now replaced
with right + left mouse button click. To make an action, press and hold right
button, then press left mouse button.
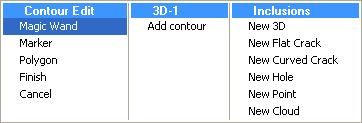
Magic Wand tool
- While creating a contour right click mouse on Scene and select Magic Wand tool
in context menu:
- Draw some line inside inclusion area with left mouse button, for example from
right upper corner to left bottom corner

- The contour will be completed automatically:
- To precise contour draw with right+left mouse buttons to indicate non-inclusion
area. Draw with left mouse button to indicate inclusion area
- To complete creating contour select Finish in context menu:
Marker Tool
- Right click mouse on Scene and select Marker tool in context menu:
- Draw with left mouse button; Press and hold right mouse button and press left mouse
button to erase the selection
- To complete creating contour select Finish in context menu:
Note. Marker tool size can be changed with keys [ and ] (square brackets) on
keyboard
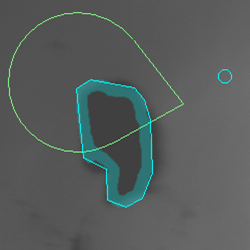
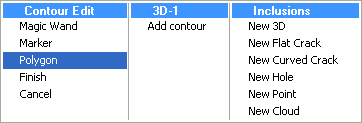
Polygon tool
- Right click mouse on Scene and select Polygon in context menu
- Add points with left mouse button, Press and hold right mouse button and press
left mouse button to remove points
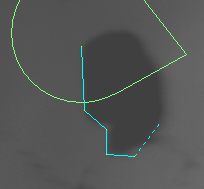
- Use left mouse button double click to enclose contour
- To perform enclosed contour insert points to the nearest side with left mouse click
- To complete creating contour select Finish in context menu:
Note. There are several methods to finish creating contour:
Just begin to make a new action like add contour, add new inclusion, select another
inclusion and so on or switch to Microscope or Model view mode. The contour will
be enclosed and finished automatically (in case the contour is correct and has no self
intersections).
To cancel creating contour select Cancel in context menu
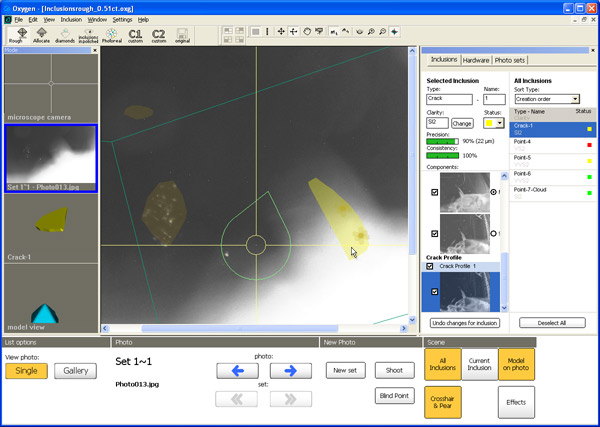
New Inclusion selection tool allows to select inclusions in Scene, change its clarity and
status.
To activate new tool press button  on the top panel. To deactivate it press button on the top panel. To deactivate it press button 
To change properties of Inclusion:
- Press button to activate Inclusion select tool
- To select an inclusion in Scene put mouse over an inclusion and left click
Note. If mouse put over an inclusion it will be highlighted by aureole
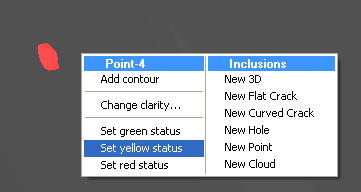
- To change properties of the selected inclusion:
- Right click mouse
- Select an action in context menu:
- Change clarity…
- Set green status
- Set yellow status
- Set red status
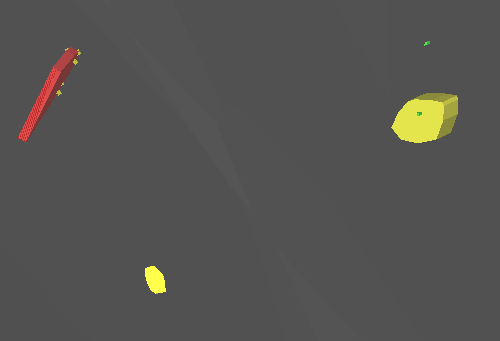
For example, select Set yellow status
The inclusion's status has changed to yellow:
- Press button to deactivate Inclusion select tool
Also it is possible to use Inclusion selection tool in 2D mode by the same way.
Note. If mouse put over an inclusion it will be highlighted by yellow transparent color
Download Oxygen Microscope Documentation (PDF)
| 


