|
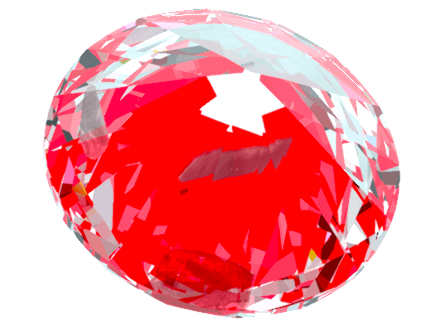
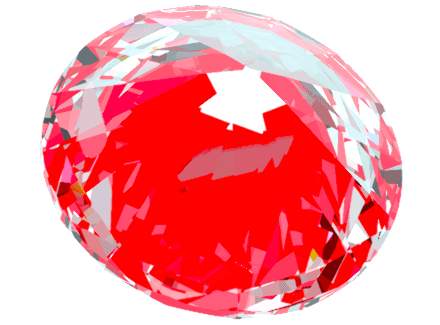
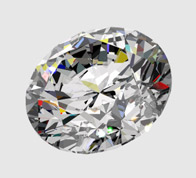
The Photorealistic mode allows to make HDR photorealistic visualization of allocated
diamonds and inner inclusions.
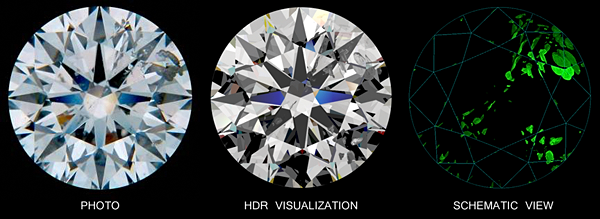
Now all the standard lightings - Office, Disco, IdealScope, ASET and other are available in the HDR photorealistic mode. We have also added two new HDR-specific lightings, namely HDR Default and HDR Disco II, to emphasize the benefits of the HDR visualization.
To view a photorealistic image of an allocated diamond with inclusions inside:
- Load photos used for constructing inclusions. They are needed for more realistic rendering
- Press button Photoreal
 on Toolbar to switch on Photorealistic mode on Toolbar to switch on Photorealistic mode
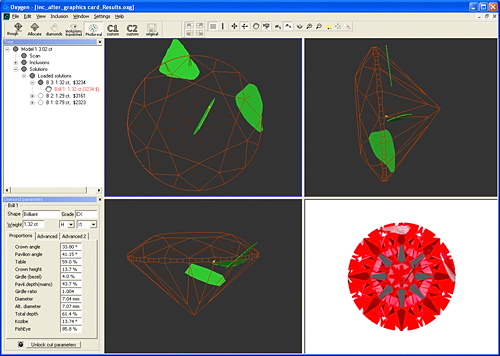
- Select a diamond in the tree of solutions
- See a photorealistic diamond image in the right bottom corner
Warning! The HDR
photorealistic diamond and
inclusions visualization requires
Graphics hardware supporting
specific features. Please test
your GPU (Graphics hardware)
with DiamCalc - Graphics Compatibility Evaluator utility.
This utility will attempt to
render a reference data set in
order to check if your Graphics
hardware is compatible with
new OctoNus HDR rendering
engine. Even if you get negative test result the non-HDR visualization will be available in
the program. Most of existing Windows computers is compatible with non-HDR OctoNus
rendering engine.
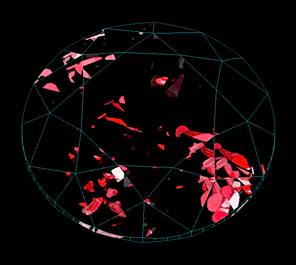
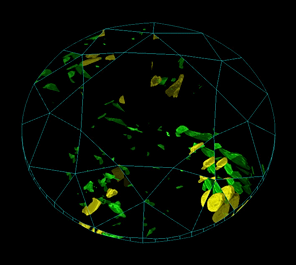
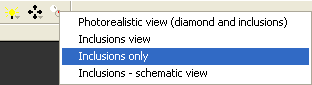
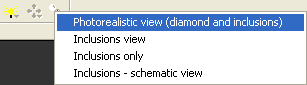
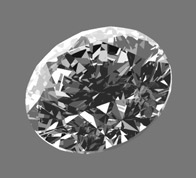
There are four types of inclusions visualization available in the program:
| Photorealistic view (diamond and inclusions) |
Inclusions view (increased contrast for enhanced
inclusions visibility) |
 |
 |
| Inclusions only |
Inclusions - schematic view (with status of
inclusion in allocation process) |
 |
 |
To select type of inclusions visualization:
- Press button
 in the top panel in the top panel
- Select type of inclusions visualization from the list
If photos used for inclusions construction are loaded into the project, inclusions texture
will be created. Textures allow to make more realistic inclusions visualization.
| Inclusions with texture |
 |
| Inclusions without texture |
 |
Download the example, oxg file with photos
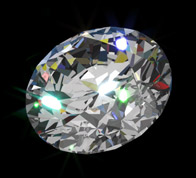
There are three new lightings: HDR Default, HDR Disco II and DarkField (special).
Warning! The HDR
photorealistic diamond and
inclusions visualization requires
Graphics hardware supporting
specific features. Please test
your GPU (Graphics hardware)
with DiamCalc - Graphics Compatibility Evaluator utility.
This utility will attempt to
render a reference data set in
order to check if your Graphics
hardware is compatible with
new OctoNus HDR rendering
engine. Even if you get negative test result the non-HDR visualization will be available in
the program. Most of existing Windows computers is compatible with non-HDR OctoNus
rendering engine.
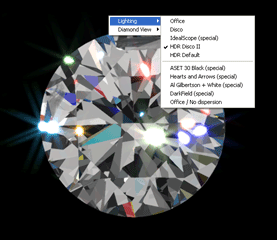
To see new lighting:
- Be sure you selected Photorealistic view type of inclusion visualization (lighting
affects other visualization modes as well, but it might be harder to notice there)
- Press button
 in the top panel in the top panel
- Select lighting from the list
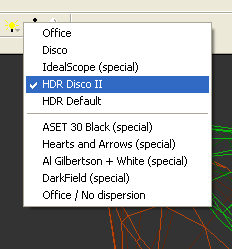
- See photorealistic visualization of a future diamond
| HDR default + Inclusions |
HDR Disco II + Inclusions |
Dark Field (special) |
 |
 |
 |
Note. Use context menu to easy change Lighting and Diamond view. Right click mouse
in Scene and select settings:
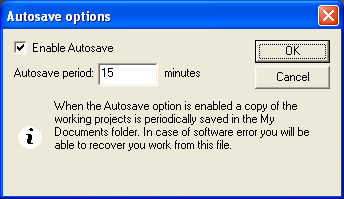
New option allows to save oxg file
automatically. When Autosave option
is enabled a copy of working project is
saved periodically in file
****_Autosave in the folder My
Documents. In case of software
unexpected error you will be able to
recover your work.
To switch on / off Autosave option and
make Autosave settings:
- Open panel AutoSave options from menu Settings / Autosave options…
- Check / uncheck section Enable Autosave
By default auxiliary points are not imported into the Helium Rough / Pacor Client and not available in allocation.
To import auxiliary points into Helium Rough / Pacor Client:
- Check box Enable auxiliary points in allocation in the menu Inclusion in the Oxygen program
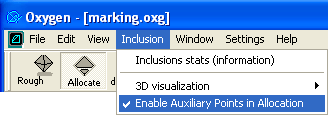
- Save oxg file
- Import oxg file into Helium Rough / Pacor Client
| 


