|
Applicable to:
- Brilliant
- Rounded Fancies / Marquise, Oval, Pear
The definition has been updated. Follow the link for more details.
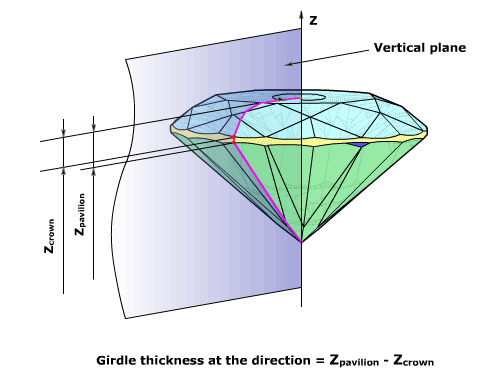
The girdle thickness is measured in 720 directions in steps of 0.5 degrees. The thickness of the girdle any given direction is measured by intersecting the vertical plane
that defines the direction with the facets that constitute the girdle. The software finds the upper and lower points of the intersection between the girdle and the vertical plane.
The difference between the Z coordinates of these points (along vertical axis) is the final thickness of the girdle in the given direction.

If there are extra facets on the girdle, they are included into the
girdle for the purposes of this measurement. Unlike Crown height or
Pavilion depth measurements, no virtual model is used.

The obtained arrays of values are used to draw
the involutes of the girdle surface and to determine the bezel,
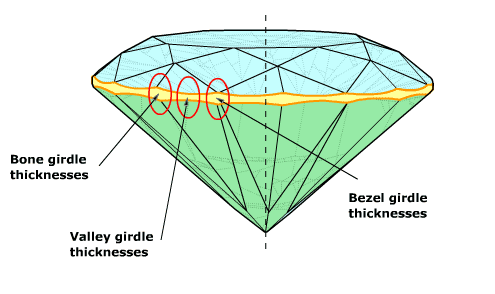
valley and bone girdle thicknesses. The valley, bezel and
bone girdle thicknesses may be measured in at most 16, 8 and
8 points accordingly for most rounded cuts. These girdle thicknesses are measured using a virtual cut without Extra facets.

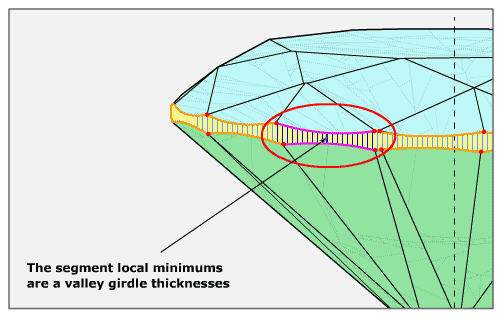
Firstly the valley girdle thicknesses are calculated. The whole girdle is separated into segments that correspond to crown upper facets and pavilion halves.
These segments indicate areas on the girdle with the minimum thickness, i.e. valley girdle thickness. The software searches for the minimum of the girdle thickness within
each segment and remembers the azimuth of the found minimum.

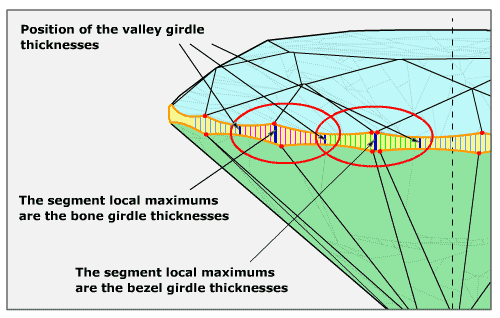
In their turn the found minima break the girdle into areas which contain thickness maximums (bezel and bone). The software searches for the maximum of the
girdle thickness within each area and remembers the azimuth of the found maximum.

For each type of girdle thickness the software calculates the average, minimum, maximum and deviation of corresponding values.
Comprehensive list of the Helium report parameters:
Measurements are used in different systems and tools:
|


